LD E-Form Filler User Manual
6. Operation of E-Form Filler
6.1 Start Up E-Form Filler
-
To launch E-Form Filler, please choose "Start
 All Programs
Versitech
e-Form Filler" from the task bar.
After E-Form Filler is launched, you could select an existing E-Form by choosing "E-Form
Open" from the menu.
All Programs
Versitech
e-Form Filler" from the task bar.
After E-Form Filler is launched, you could select an existing E-Form by choosing "E-Form
Open" from the menu.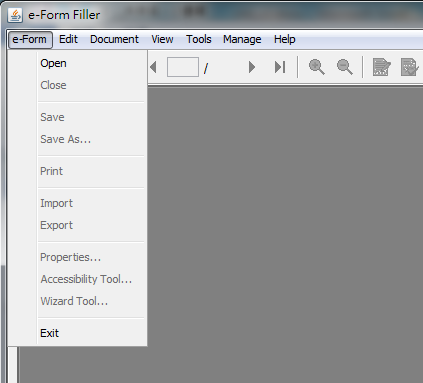
-
Select the desired E-Form file and click "Open" button to open the E-Form.
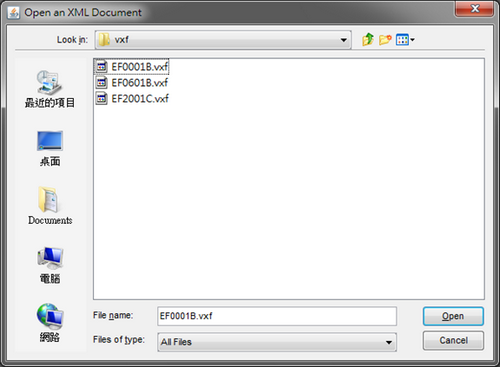
You can also launch the E-Form Filler by double clicking any E-Form file (with .vxf file extension).
6.2 Fill the E-Form
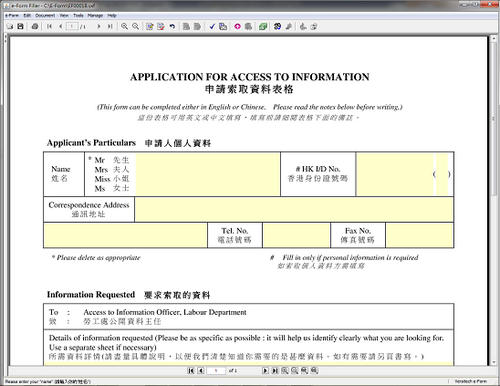
To fill the E-Form, please set the cursor to the relevant field and then type the data into the field. To jump to next filed, simply use "Tab" on the keyboard. When the flashing cursor is displayed at the next field, fill in the required data.
Some e-Form documents may contain multiple pages. You can navigate between pages by choosing one of the following buttons on the tool bar.
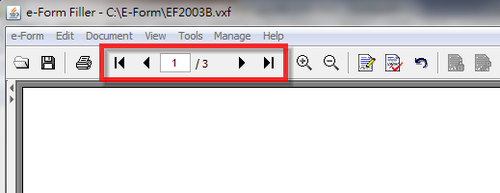
 | Navigate to the First Page of the E-Form; |
 | Navigate to the Previous Page of the E-Form; |
 | Navigate to the Next Page of the E-Form; |
 | Navigate to the Last Page of the E-Form; and |
 | Navigate to the Specific Page of the E-Form by entering your desired page number into the text box and press "Enter" on the keyboard. |
6.3 Manage Attachment(s)
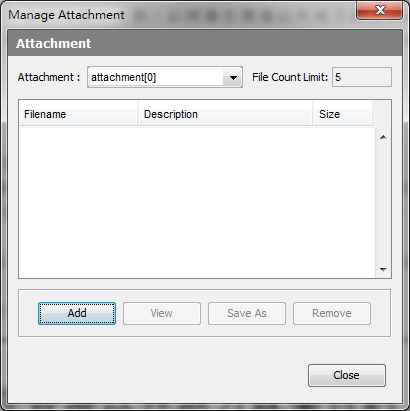
- Click "Add" button will add the target file to the E-Form. Each E-Form has different attachment limit. For example, the dialog box as shown above cannot attach more than 5 files;
- Click "View" button will view the selected attachment file;
- Click "Save As" button will extract a file from attachment envelope to a selected directory; and
- Click "Remove" button will remove the selected attachment file.
6.4 Sign the E-Form
Note:
Once signature is applied, the E-Form cannot be further amended. The signature has to be removed (Please refer to Signature Removal) beforehand if you wish to make any amendments to a signed E-Form.
-
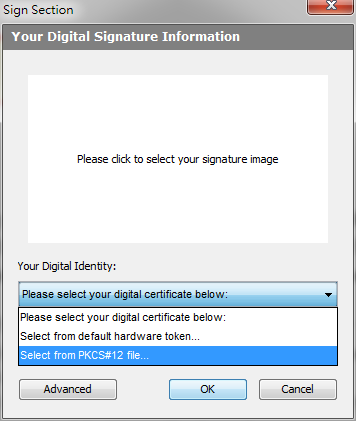
To sign the E-Form, please click the signature box at the E-Form.
-
The "Sign Section" dialog box will be shown, then select "Select from PKCS#12 file".
-
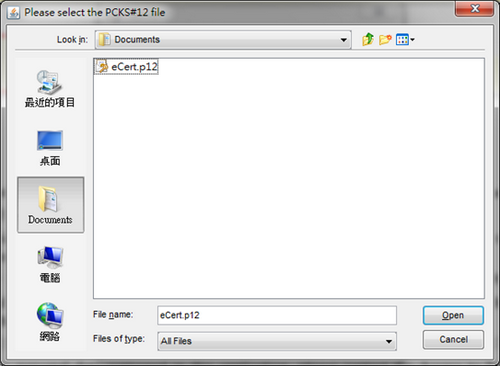
The following dialog box will be shown. Specify the file location of your certificate (in either ".p12" or ".pfx" format).
-
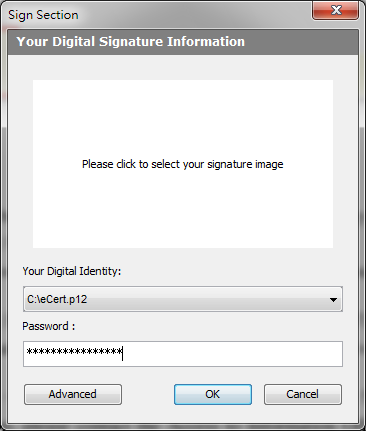
Enter password of the certificate file and click "OK" button to confirm your digital signature.
-
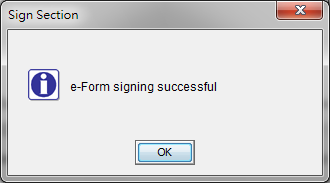
The following dialog box will be shown if the E-Form is signed successfully.
6.4.1 Signature Removal
-
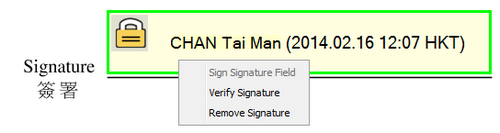
To remove the signature(s) form the signed E-Form, please click signed signature box and select "Remove Signature".
-
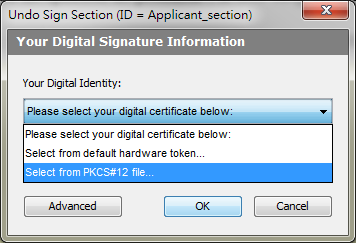
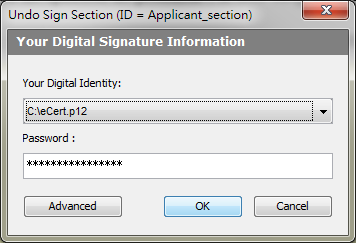
The "Undo Sign Section" dialog box will be shown, then select "Select from PKCS#12 file".
-
Specify the file location of the digital certificate originally used in signing the E-Form.
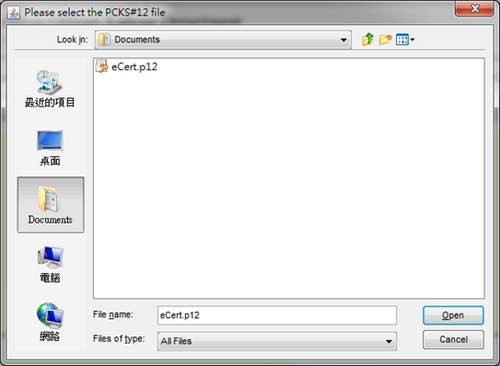
-
Enter password of the certificate file and click "OK" button to confirm to remove the signature.
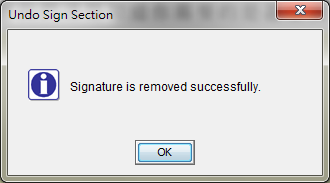
-
The following dialog box will be shown if the signature is removed successfully.
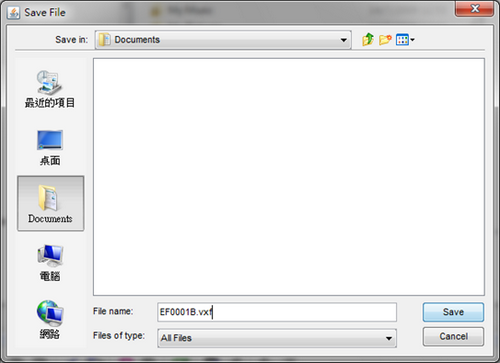
6.5 Save the E-Form
You may save an E-Form document to a file at any time. The saved E-Form can be opened for viewing and editing later. You should save the E-Form upon completion and submission. It is highly recommended to submit an encrypted form. (Details are covered in Encrypt the E-Form and Send the E-Form )
6.6 Encrypt the E-Form
For security purpose, you are highly recommended to encrypt your E-Form document before submission.
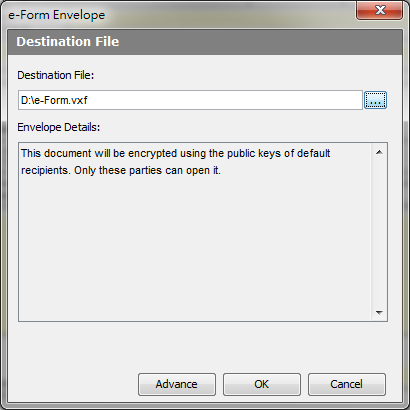
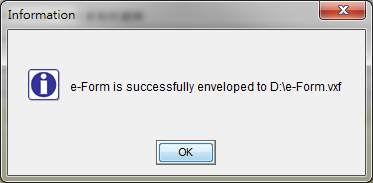
The following dialog box will be shown if the encrypted E-Form is saved successfully.
6.7 Send the E-Form
Please make sure that you have completed the E-Form fully before submission. You can submit the completed E-Form by e-mail at eform@labour.gov.hk.